

Pie Crust Better Homes And Gardens
")
I guess you could say that I'm a bit of a pie crust snob.
I love a tender, flaky crust that is just barely brown on the edges, never burnt or crispy. And don't even try to convince me that those pathetic, pre-made, refrigerated or frozen crusts will do. No way!
Every homesteader-chef needs to have a couple tried-and-true pie recipes in their arsenal. The methodology of a good pie crust is very similar to that of a good biscuit (they are both "pastries", after all). Use cold fat, and do not, I repeat DO NOT, overwork the dough.
The problem with most modern day pie crust recipes is that they call for shortening. Since shortening is a hydrogenated, "fake" fat, I haven't had it in my home for years. Thankfully, we still eat lots of pies, since it's easy to swap out that icky fat for a healthier one like butter, coconut oil, or lard instead.
The Prairie Homestead Cookbook
I love this pie crust recipe so much that I included it in myThe Prairie Homestead Cookbook. If you love simple, heritage, old-fashioned and super delicious recipes, make sure you check out my popular cookbook!
Learn more about The Prairie Homestead Cookbook here.
Simple Pie Crust Recipe
Yield: One 9″ crust
Ingredients:
- 1 1/4 cups unbleached, all purpose flour (you can use whole wheat here, but it won't be as tender. I don't mind using a little white flour for this recipe)
- 1/4 teaspoon sea salt
- 1/3 cup cold butter or lard or firm coconut oil (coconut oil will make a slightly tougher crust, but still yummy)
- 4-6 Tablespoons cold water
Instructions:
In a medium bowl, mix together the flour and salt.
Cut in the fat using a pastry blender or two knives. You can use a food processor if you'd like, just be sure not to over-process.
Tip: If you are using butter, freeze it first, and then grate it with a cheese grater. The butter shreds are the perfect size for mixing into your dough.
The flour/fat mixture should resemble coarse crumbs. Little chunks of butter, coconut oil, or lard are perfectly o.k. and actually preferred– this is what will give you a flakier end result.
Carefully add the water, one tablespoon at a time. You are looking for the dough to stick together and form a rough ball, but you don't want a sticky mess. You might use your hands to form the ball, but be careful not to overwork the dough. Err on the side of crumbly!
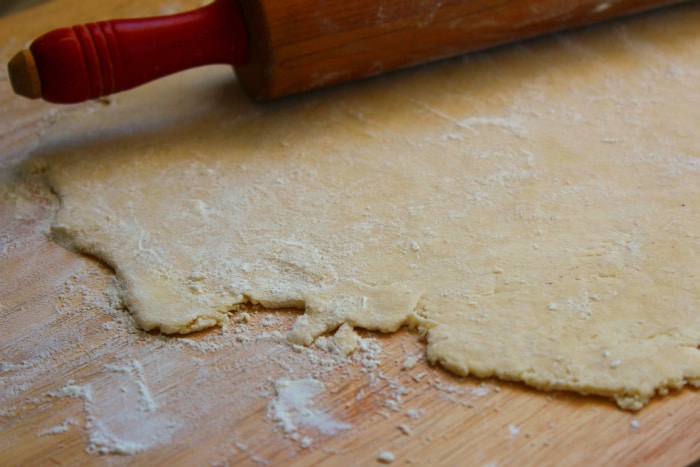
Generously flour your countertop and roll out the dough until it isseveral inches larger than the diameter of your 9″ pie pan. (you might need to flour the top of the dough as you roll, to prevent sticking and tearing).
Carefully fold the dough into quarters and place into your pan. Unfold.
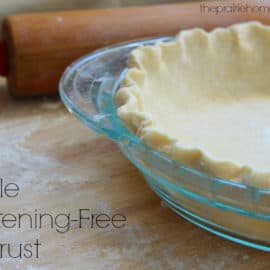
Trim around the edges (if needed), but leave an overhang around the edges of the pan. Gently fold the excess dough under itself, then crimp the edges as desired to make it pretty.
Fill with your favorite pie filling and bake as directed in the pie recipe you're using, or refrigerate until you need it.
(Follow these instructions if your recipe calls for a pre-baked crust.)
Be sure to cover with a pie shield or foil strips while baking (at least for the first part, anyway). Nothing worse than a crunchy, overdone crust!
Easy Shortening-Free Pie Crust
Ingredients
- 1 1/4 cups unbleached, all purpose flour (whole wheat works but is less tender)
- 1/4 t sea salt (like this)
- 1/3 cup cold butter or lard (or firm coconut oil for a slightly tougher crust)
- 4–6 T cold water
Instructions
- In a medium bowl, mix flour and salt together
- Cut in the fat using a pastry blender or two knives. You can use a food processor if you'd like, just be sure not to over-process.
- When the flour/fat mixture resemble coarse crumbs carefully add the water, one tablespoon at a time forming a rough ball (not a sticky mess!)
- Generously flour countertop and roll out the dough until it's several inches larger than the diameter of your 9″ pie pan (you may need to flour the top of the dough as you roll, to prevent sticking and tearing)
- Carefully fold the dough into quarters and place into your pan
- Unfold
- Trim around the edges (if needed), but leave an overhang around the edges of the pan
- Gently fold excess dough under itself, then crimp edges to make pretty
- Fill with your favorite pie filling and bake as directed, or refrigerate until you need it
Notes
Be sure to cover with a pie shield or foil strips while baking (at least for the first part, anyway). Nothing worse than a crunchy, overdone crust!
Need some ideas on what to do now that you have a lovely crust?
Fill it with seasonal fruit for a stunning dessert, make my old-fashioned Cheddar Pear Pie, or grab a bag of peach pie filling from your freezer for a quick treat. The sky's the limit!
You can also try my Honey Pumpkin Pie recipe and/or my Old-Fashioned Lemon Whey Pie recipe.
And don't forget to check out my Prairie Homestead Cookbook!

Learn to Cook Like a Farmer!
Get my best tips & recipes for transforming your kitchen into a farmstyle kitchen, no matter where you live! Enter your best email for instant access>>
Pie Crust Better Homes And Gardens
Source: https://www.theprairiehomestead.com/2011/05/simple-shortening-free-pie-crust.html
Posted by: bonnerhisavent61.blogspot.com
0 Response to "Pie Crust Better Homes And Gardens"
Post a Comment